
Acrylic board has revolutionized modern construction and design applications with its exceptional versatility and durability. This transparent thermoplastic material offers superior clarity compared to glass while maintaining remarkable impact resistance and weather stability. Whether you're working on architectural glazing, retail displays, or protective barriers, understanding proper cutting and installation techniques for acrylic board ensures professional results and long-lasting performance. The growing demand for acrylic board in commercial and residential projects stems from its lightweight properties and excellent optical characteristics that make it an ideal substitute for traditional materials.
Understanding Acrylic Board Properties and Applications
Material Composition and Characteristics
Acrylic board, scientifically known as polymethyl methacrylate (PMMA), exhibits unique properties that distinguish it from other plastic materials. The molecular structure provides exceptional optical clarity with light transmission rates exceeding 92 percent, surpassing even high-quality glass. This superior transparency makes acrylic board the preferred choice for applications requiring maximum visual clarity without compromising structural integrity. The material's density of approximately 1.18 grams per cubic centimeter ensures lightweight handling while maintaining robust performance characteristics.
Temperature resistance represents another crucial advantage of acrylic board, with continuous service temperatures ranging from -40°C to 80°C without significant property degradation. This thermal stability enables outdoor applications where weather fluctuations occur regularly. Additionally, acrylic board demonstrates excellent chemical resistance to most acids, alkalis, and cleaning agents commonly encountered in commercial environments. The material's UV stability prevents yellowing and brittleness over extended exposure periods, maintaining aesthetic appeal and structural performance throughout its service life.

Common Industrial and Commercial Applications
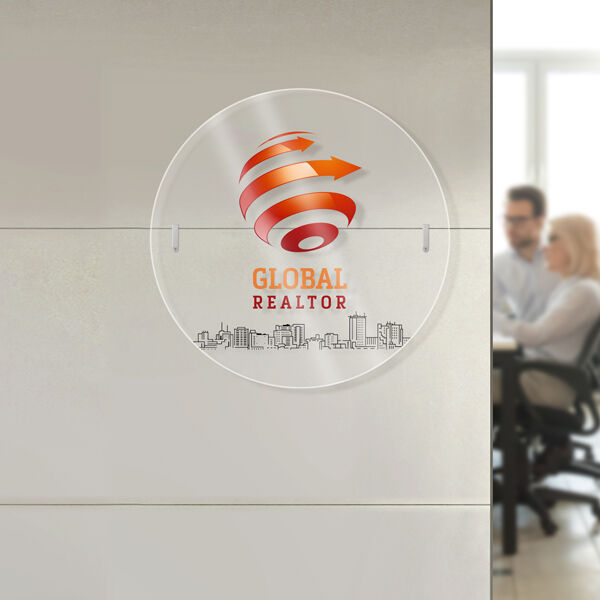
The construction industry extensively utilizes acrylic board for glazing applications in both interior and exterior installations. Curtain walls, skylights, and safety barriers benefit from the material's impact resistance, which exceeds glass by approximately ten times. Retail environments frequently incorporate acrylic board for display cases, protective shields, and decorative panels that require frequent cleaning and handling. The material's scratch resistance and clarity retention make it ideal for high-traffic commercial spaces.
Architectural lighting applications showcase acrylic board's light-diffusing capabilities when textured surfaces are employed. Edge-lit panels create uniform illumination for signage and decorative features while maintaining energy efficiency. Marine applications leverage the material's saltwater resistance and impact strength for boat windows, deck panels, and protective enclosures. The aerospace industry utilizes specialized acrylic board formulations for aircraft windows and interior components where weight reduction and optical clarity are paramount considerations.
Essential Tools and Equipment for Acrylic Board Processing
Cutting Tools and Blade Selection
Successful acrylic board cutting requires appropriate tool selection based on material thickness and desired edge quality. Circular saws equipped with fine-tooth carbide blades provide clean cuts for thick acrylic board sections exceeding 10 millimeters. The recommended blade configuration includes 80 to 100 teeth per 250-millimeter diameter with alternating top bevel geometry to minimize chipping and melting. Band saws offer superior control for curved cuts and intricate shapes when fitted with bi-metal blades designed for plastic materials.
Router applications enable precise edge profiling and decorative treatments on acrylic board surfaces. Single-flute carbide bits prevent material buildup and overheating during routing operations. Laser cutting represents the most precise method for complex geometries and tight tolerances, producing polished edges without additional finishing requirements. However, laser parameters must be carefully adjusted to prevent heat-affected zones that could compromise material properties around cut edges.
Safety Equipment and Workspace Preparation
Personal protective equipment remains essential when working with acrylic board due to static electricity generation and fine particle production during cutting operations. Safety glasses with side shields protect against flying debris, while dust masks prevent inhalation of acrylic particles. Anti-static wrist straps minimize electrostatic discharge that could attract dust to freshly cut surfaces. Work surfaces should be covered with protective materials to prevent scratching during handling and positioning operations.
Adequate ventilation systems remove heat and particles generated during cutting processes. Dust collection attachments on power tools capture debris at the source, maintaining clean work environments and preventing contamination of finished surfaces. Temperature control in the workspace prevents thermal stress that could cause cracking in large acrylic board panels during installation procedures.
Step-by-Step Cutting Techniques and Best Practices
Measuring and Marking Procedures
Accurate measurement and marking form the foundation of successful acrylic board cutting operations. Steel rulers and precision squares ensure dimensional accuracy while fine-tip permanent markers create visible guidelines without damaging surface finishes. Masking tape applied over cutting lines protects against scratching and provides tear-resistant marking surfaces for extended projects. Double-checking measurements prevents costly material waste and ensures proper fit during installation phases.
Template creation using cardboard or thin plywood allows verification of complex shapes before cutting expensive acrylic board materials. This approach enables pattern adjustments and fit testing without compromising final materials. Center punch marks at drill hole locations prevent bit wandering and ensure accurate hole placement for fastener installation.
Cutting Execution and Quality Control
Proper cutting technique begins with securing acrylic board firmly to prevent vibration and movement during cutting operations. Clamps should distribute pressure evenly to avoid stress concentrations that could cause cracking. Feed rates must be controlled to prevent overheating while maintaining consistent cut quality. Slower speeds with steady advancement produce superior edge finishes compared to aggressive cutting approaches that generate excessive heat.
Edge finishing immediately follows cutting operations to remove tool marks and achieve desired surface textures. Progressive sanding using 220, 400, and 600-grit abrasives followed by polishing compounds restores optical clarity to cut edges. Flame polishing provides mirror finishes for display applications but requires careful temperature control to prevent material distortion. Quality inspection using proper lighting reveals any imperfections requiring additional finishing work.
Installation Methods and Fastening Systems
Mechanical Fastening Approaches
Mechanical fastening systems provide reliable attachment methods for acrylic board installations in structural applications. Stainless steel fasteners prevent galvanic corrosion and maintain long-term joint integrity in outdoor environments. Oversized holes accommodate thermal expansion and contraction cycles without inducing stress concentrations around fastener locations. Neoprene washers distribute loads and provide weather sealing for exterior installations.
Captured fastening systems eliminate exposed hardware while maintaining accessibility for maintenance operations. Aluminum extrusions designed specifically for acrylic board applications provide structural support and weather sealing simultaneously. These systems accommodate material movement while maintaining aesthetic appeal in architectural glazing applications where visual continuity is essential.
Adhesive Bonding Techniques
Structural adhesives offer invisible joining methods for acrylic board assemblies requiring smooth, continuous surfaces. Acrylic-based adhesives provide excellent compatibility and weather resistance for permanent installations. Surface preparation involves thorough cleaning with isopropanol to remove contaminants that could compromise bond strength. Masking tape protects adjacent surfaces from excess adhesive during application procedures.
Curing conditions significantly influence final bond performance in acrylic board assemblies. Room temperature applications require 24 to 48 hours for full strength development, while elevated temperatures accelerate curing processes. Pressure application during curing ensures intimate contact between bonding surfaces and eliminates voids that could compromise joint integrity. Post-cure inspection verifies complete adhesion and identifies any areas requiring additional attention.
Troubleshooting Common Installation Challenges
Thermal Expansion Management
Thermal expansion represents a significant consideration in large acrylic board installations where temperature fluctuations occur regularly. Linear expansion coefficients of approximately 7×10^-5 per degree Celsius require careful joint design to accommodate movement without inducing stress. Expansion joints should be incorporated at regular intervals based on panel dimensions and expected temperature ranges.
Glazing systems must accommodate both linear and differential expansion between acrylic board panels and supporting structures. Sliding connections allow movement while maintaining weather sealing through compressed gasket systems. Proper gasket selection ensures long-term sealing performance while accommodating repeated expansion cycles throughout the installation's service life.
Stress Crack Prevention
Stress cracking in acrylic board installations typically results from improper handling, over-tightened fasteners, or inadequate thermal expansion accommodation. Prevention strategies include proper material storage to avoid sustained loading conditions that could induce creep deformation. Installation procedures should minimize bending stresses during positioning and fastening operations.
Environmental stress cracking can occur when acrylic board contacts certain chemicals or solvents during installation or maintenance activities. Compatible cleaning agents and installation materials prevent chemical attack that could compromise material integrity. Regular inspection protocols identify early signs of stress cracking before propagation occurs, enabling preventive maintenance interventions.
Quality Control and Maintenance Considerations
Installation Verification Procedures
Post-installation quality control ensures acrylic board systems perform as intended throughout their design service life. Visual inspection under proper lighting conditions reveals surface defects, installation irregularities, and potential stress concentrations requiring attention. Dimensional verification confirms proper fit and clearances for thermal expansion accommodation.
Water testing for exterior installations verifies weather sealing integrity before final acceptance. Systematic application of test water at various pressure levels identifies potential leak paths requiring remediation. Documentation of installation parameters and quality control results provides valuable reference information for future maintenance activities and warranty compliance.
Long-Term Maintenance Requirements
Routine cleaning protocols for acrylic board installations preserve optical clarity and surface appearance throughout the material's service life. Mild detergent solutions and soft cleaning cloths prevent scratching while removing dirt and environmental contaminants. Harsh chemicals and abrasive cleaning materials should be avoided to prevent surface damage and stress cracking initiation.
Periodic inspection of fasteners, gaskets, and sealants ensures continued weather resistance and structural integrity. Replacement schedules for consumable components like gaskets prevent water intrusion and maintain system performance. Professional assessment of large installations identifies potential issues before they compromise system integrity or require extensive repair procedures.
FAQ
What is the maximum thickness of acrylic board that can be cut with standard woodworking tools?
Standard woodworking tools can effectively cut acrylic board up to 25 millimeters thick when equipped with appropriate blades and proper cutting techniques. Thicker sections require industrial equipment or specialized cutting services to achieve acceptable edge quality and dimensional accuracy. Feed rates must be reduced for thicker materials to prevent overheating and edge quality degradation.
How do I prevent cracking when drilling holes in acrylic board?
Preventing cracks during drilling requires sharp drill bits specifically designed for plastic materials, controlled feed rates, and proper backing support. Pilot holes should be drilled first for large fasteners, and drill speeds should be reduced to minimize heat generation. Clamping the acrylic board securely prevents vibration that could cause stress cracking around hole edges.
What adhesives are compatible with acrylic board for structural applications?
Structural acrylic adhesives, modified cyanoacrylates, and certain polyurethane formulations provide excellent compatibility with acrylic board materials. Solvent-based adhesives should be avoided as they can cause environmental stress cracking. Surface preparation with isopropanol cleaning ensures optimal bond strength and long-term durability in structural applications.
Can acrylic board be thermoformed after cutting to final dimensions?
Acrylic board can be successfully thermoformed after cutting, but edge finishing should be completed after forming operations to achieve optimal surface quality. Forming temperatures between 160°C and 180°C allow shaping without material degradation. Proper tooling design and controlled cooling rates prevent stress concentrations that could lead to cracking during service.
Table of Contents
- Understanding Acrylic Board Properties and Applications
- Essential Tools and Equipment for Acrylic Board Processing
- Step-by-Step Cutting Techniques and Best Practices
- Installation Methods and Fastening Systems
- Troubleshooting Common Installation Challenges
- Quality Control and Maintenance Considerations
-
FAQ
- What is the maximum thickness of acrylic board that can be cut with standard woodworking tools?
- How do I prevent cracking when drilling holes in acrylic board?
- What adhesives are compatible with acrylic board for structural applications?
- Can acrylic board be thermoformed after cutting to final dimensions?